
I have a Zivver account
User manuals and reference documentation
Text tags
Introduction
With the Text Tags feature, users can add predefined tags to a document to specify the type and placement of various fields, such as signatures, dates, and text fields. These tags act as placeholders and can be positioned anywhere in the document. During the Prepare flow, our platform will automatically recognize and convert them into the appropriate input fields.
Supported file formats: .docx and .pdf
Text tags
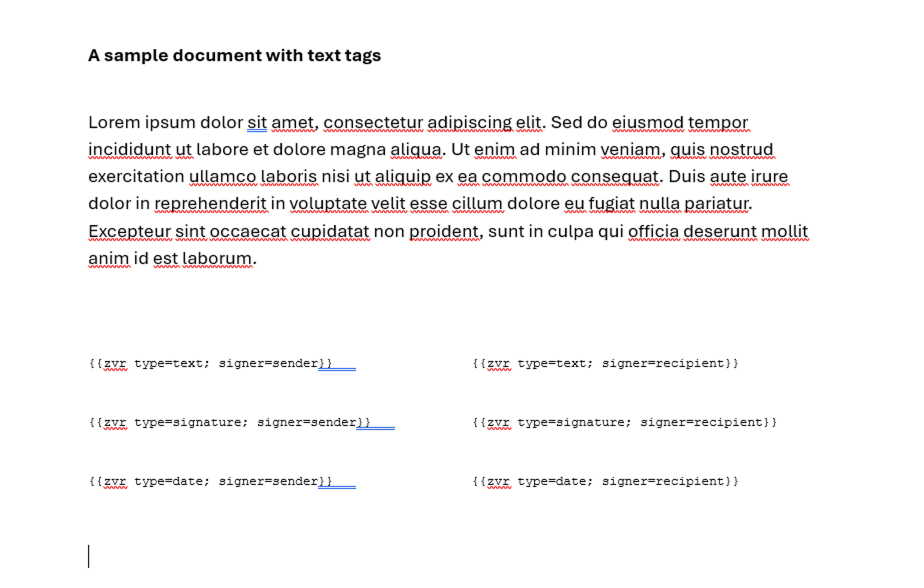
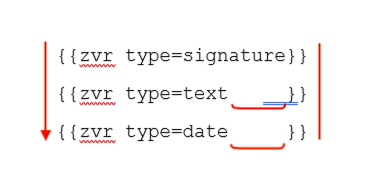
A text tag can be created by adding curly brackets with the indicator zvr to a Word or PDF document. Within the text tag you must specify whether it is a signature, text, or date field.
| Text Tag | Description |
|---|---|
{{zvr type=signature}} | A text tag for a signature |
{{zvr type=text}} | A text tag for text |
{{zvr type=date}} | A text tag for a date |
{{zvr type=signature; signer=2}} | A text tag assigned to the second signer of the document |
{{zvr type=signature; x=10; y=10; height=50; width=150}} | A text tag with custom placement |
{{zvr type=signature; page=all}} | A text tag for a field that should appear on all pages |
{{zvr type=signature; page=3,5}} | A text tag for a field that should appear on two pages |
Available parameters for text tags
| Parameter | Required? | Possible values | Description |
|---|---|---|---|
| type | yes | signature, date, text | Defines whether the field should be used for a signature, date, or text |
| signer | no | number | Defines who should be assigned to the field by default |
| height | no | number (at least 12) | The height of the field in points |
| width | no | number (at least 12) | The width of the field in points |
| x | no | number | The x coordinate (horizontal position) of the field |
| y | no | number | The y coordinate (vertical position) of the field |
| page | no | list of numbers or “all” | The page(s) of the field. If multiple pages are specified (e.g. page=1,2 or page=all), multiple fields will be created |
Using text tags
There are three main steps for sending a document using text tags:
- Add text tags to a document
- Upload the document and add recipients to the Zivver message
- Prepare the document and make sure all fields are placed properly
1. Add text tag to document
Add a text tag to a document before uploading it via Secure eSignatures.
Sample PDF document
Sample Word document
2. Upload document, add recipients, define the signers
Similar to a regular flow, the document with text tags should be uploaded through the Secure eSignature side pane.
Recipient(s) should be added to the Zivver message before clicking Prepare document.
Signers should be specified before preparing the document. This ensures the fields are assigned to the correct recipient.
Example
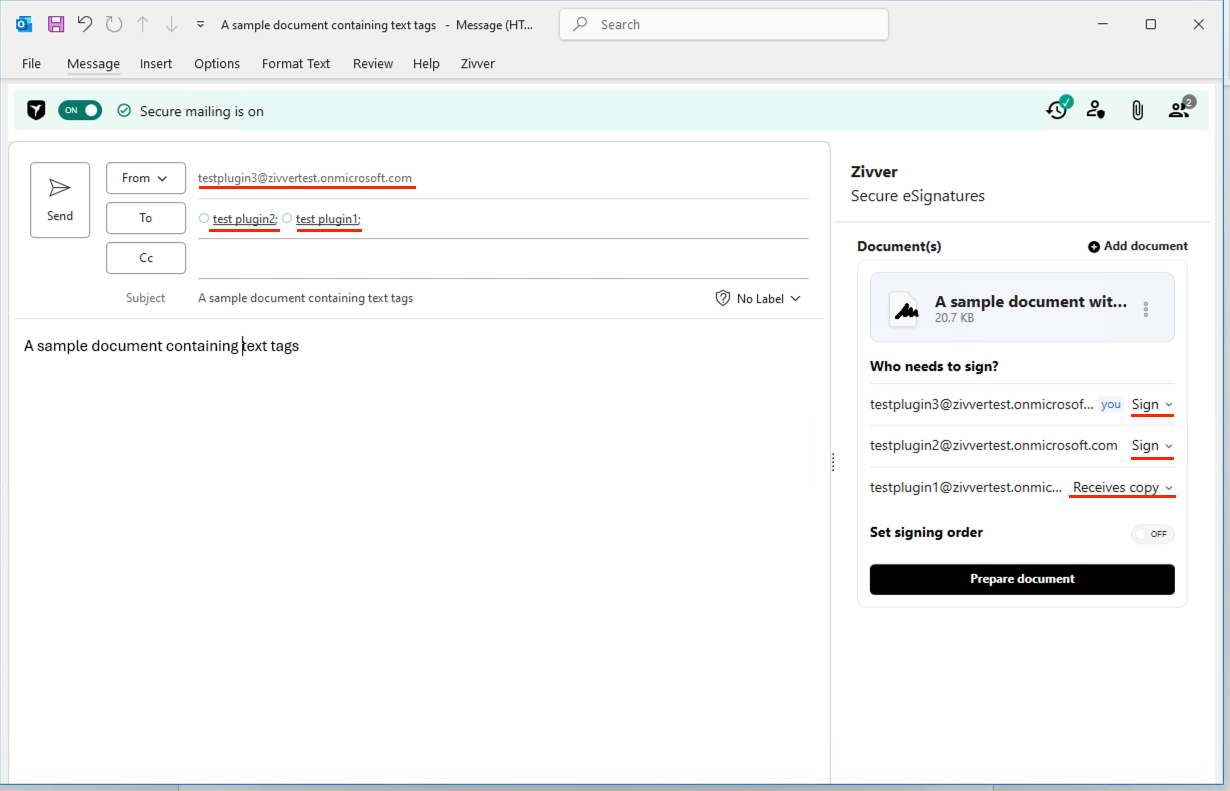
In this example there are three participants: the sender and two recipients. It is specified that only one recipient is required to sign the document.The text tag will pick up the sender and recipient email addresses and place them in the document accordingly.
Zivver Office Plugin view
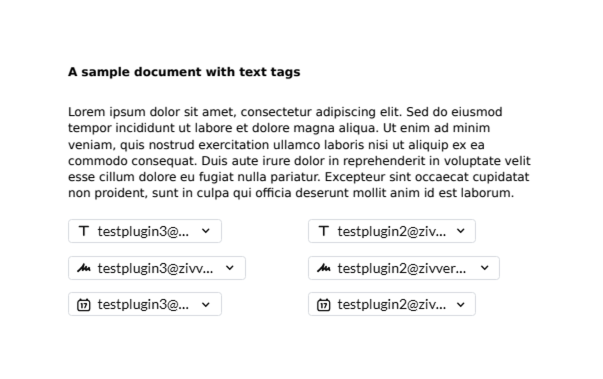
Document view

3. Prepare a document
When clicking , the text tags will be converted into regular pre-assigned fields with the appropriate assignees. The placement and assignees of the fields can still be adjusted, similar to the regular prepare flow.
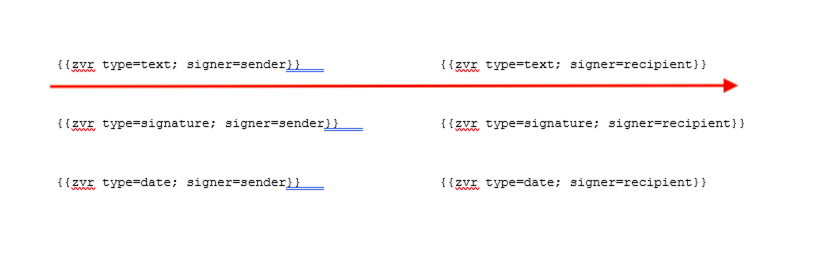
Text tags before and after the prepare flow
Before
After
Placements
By default, fields will be placed with the same position and size as the corresponding text tag. For most use cases, this is the easiest way to specify placement.
To adjust the general size of a field, increase or decrease the font size of the text tag. The width of the field can be increased by adding more whitespace to the text tag, e.g. {{zvr type=text }}.
If more precise or custom placement is necessary, the x, y, width, and height parameters can be used.
The x (horizontal) and y (vertical) coordinates specify the position of the bottom-left corner of the field. The coordinate system starts at the bottom-left corner, so specifying x=0 and y=0 would place the field in the bottom-left corner. A standard A4 document has a size of 595 x 842 pts, but this can vary for other document formats. The width and height parameters specify the size of the field itself. The minimum size is 12 x 12 points.
Recommendations
Recommendations for the best output:
Some fonts can cause placement of the fields to fail. Therefore, it is recommended to use one of these fonts: Arial, Courier New, Georgia, Impact, Times New Roman.
If horizontal alignment of the fields is important, it is recommended not to use a font size larger than 9pt:
If vertical alignment of the fields is important and fields should have the same width, align the endings of the curly brackets by adding spaces to the tags and use a monospaced font (e.g. Courier New) in which all characters have the same width:
To avoid field overlap, make sure there is space between the tags.
Limitations
- If a text tag is incorrect or incomplete, no error will be shown. The proper conversion and placement of tags must be reviewed by the user during the document prepare flow.
- The entire span of the text tag, from the opening curly brace to the closing curly brace, must fit on a single line. If a text tag covers multiple lines, either in the uploaded document or in the final PDF, the field will not be correctly recognized by Zivver and may cause the underlying text to be visible to the signer when signing the document.