
I have a Zivver account
User manuals and reference documentation
Zivver WebApp - User manual
Introduction
With Zivver, you can securely share information with colleagues, customers, patients, contacts, and other recipients. When you send a message securely, only you and the recipient(s) can read it. You can send secure messages from your web browser, a tablet or mobile phone, Outlook, and Google Workspace. This user manual focuses on using the Zivver WebApp.
In this user manual, you will learn:
- How to log in to Zivver.
- How to send Zivver messages.
- How to protect your messages with a recipient check.
- How to revoke a message afterwards.
- How to restore access to a message.
- How to check the read receipt.
Log in
To send secure messages, log in to your secure online mailbox using your web browser, such as Google Chrome.
- Go to the WebApp.
- Enter your email address.
- Click .
- Enter your password.
- Click .
- Enter your second authentication factor.
- Click .
 TipDon’t want to enter your second authentication factor every time? Then select Trust this device and skip the extra factor next time I login.
You are now logged in to Zivver and ready to read and send secure messages.
Secure your account with two-factor authentication (2FA)
Protect your account with 2FA. You’ll use a login code during the login process. You’ll receive this code via text message or through an Authenticator app. Currently, you can only configure 2FA in the Zivver WebApp.
Read how to set up 2FA with an SMS code.
Read how to set up 2FA with the Chrome Authenticator extension.
Read how to set up 2FA using the Google Authenticator app.
Read how to set up 2FA using the Microsoft Authenticator app.
Send a Zivver message
Make sure you’re logged in to your Zivver account to send a secure message.
- Log in to the Zivver WebApp.
- Click the button in the top-left corner of the screen.
- Add the desired recipients.
If you’re sending a Zivver message to this email address for the first time, you’ll be asked to choose a verification method. - Set the recipient’s verification method and send the message.
Recipient verification ensures that only the correct recipients can access your message.
Read more about the different verification methods - Solve or dismiss any issues that are highlighted.
- Click .
Security notifications
Zivver uses security notifications to inform you when certain rules are triggered. Which rules apply depends on the policies set by your organization. If your message contains sensitive information, you’ll see a notification above the message. The color of this notification bar changes depending on the configured security level.
Learn more about the different security levels
Message revocation
Zivver messages can be revoked after sending, either for all participants (including the sender) or just for recipients. Message revocation can be scheduled to occur after a set period, or it can be done immediately.
Access revocation serves two main purposes:
- You can withdraw a message that was sent by mistake.
- You can comply with laws or organizational policies that require messages not to be retained indefinitely.
How to revoke access to a Zivver message
To revoke access to a Zivver message that you have sent:
- Log in to the Zivver WebApp.
- Select the message that you want to revoke.
- Click the button in the top-right corner of the message.
- Click
 Revoke access.
A new window titled Revoke access to this message appears. - Select Revoke for recipients if you want to revoke access for the recipients only.
OR
Select Revoke for recipients and myself if you want to revoke access for both recipients and yourself. WarningIf you choose Revoke for recipients and myself, the message becomes inaccessible after the set period has passed. You cannot recover these messages.
 - Set a time period using the input box and the drop-down selector. Your organization may or may not have set a default period.
OR
Click the Revoke now link to revoke the message immediately.
The scheduled message revocation date updates according to the time period you select. - Press .
If you scheduled the revocation, a banner appears above the message header, indicating the revocation period.
If you revoked the message immediately, a blue banner appears above the message header, stating that access to the message was revoked. InfoRevoking a message will remove it from the Zivver inboxes of all recipients, including those in CC and BCC.
Restore access to a Zivver message
You can make a revoked message available to the recipients again:
- Log in to the Zivver WebApp.
- Select the message that you want to restore.
The message appears in the rightmost pane with a grayed-out look and a blue banner indicating it was revoked. - Click in the message pane.
A confirmation window appears, explaining that the message will become accessible again. - Confirm your choice by clicking .
The grayed-out look and blue banner disappear, and the message is accessible to recipients again.
Read receipt
You can view a read receipt for each message you send. That way, you know who has read your message and who has not. You can find the read receipt at the bottom left of your sent message.
The icon has four variants:
- A closed envelope means that none of the recipients have opened the message.
- A black open envelope means that one or more recipients have opened the message, but not all recipients have opened it yet.
- A green open envelope means that all recipients have opened the message.
- An orange envelope with an exclamation mark means that the message was not delivered to one or more recipients. Click the icon to see which recipients did not receive the message.
Click the button to see who has read the message and who has not.
In the image below, you can see all the icons you may encounter in a sent Zivver message in the Zivver WebApp.
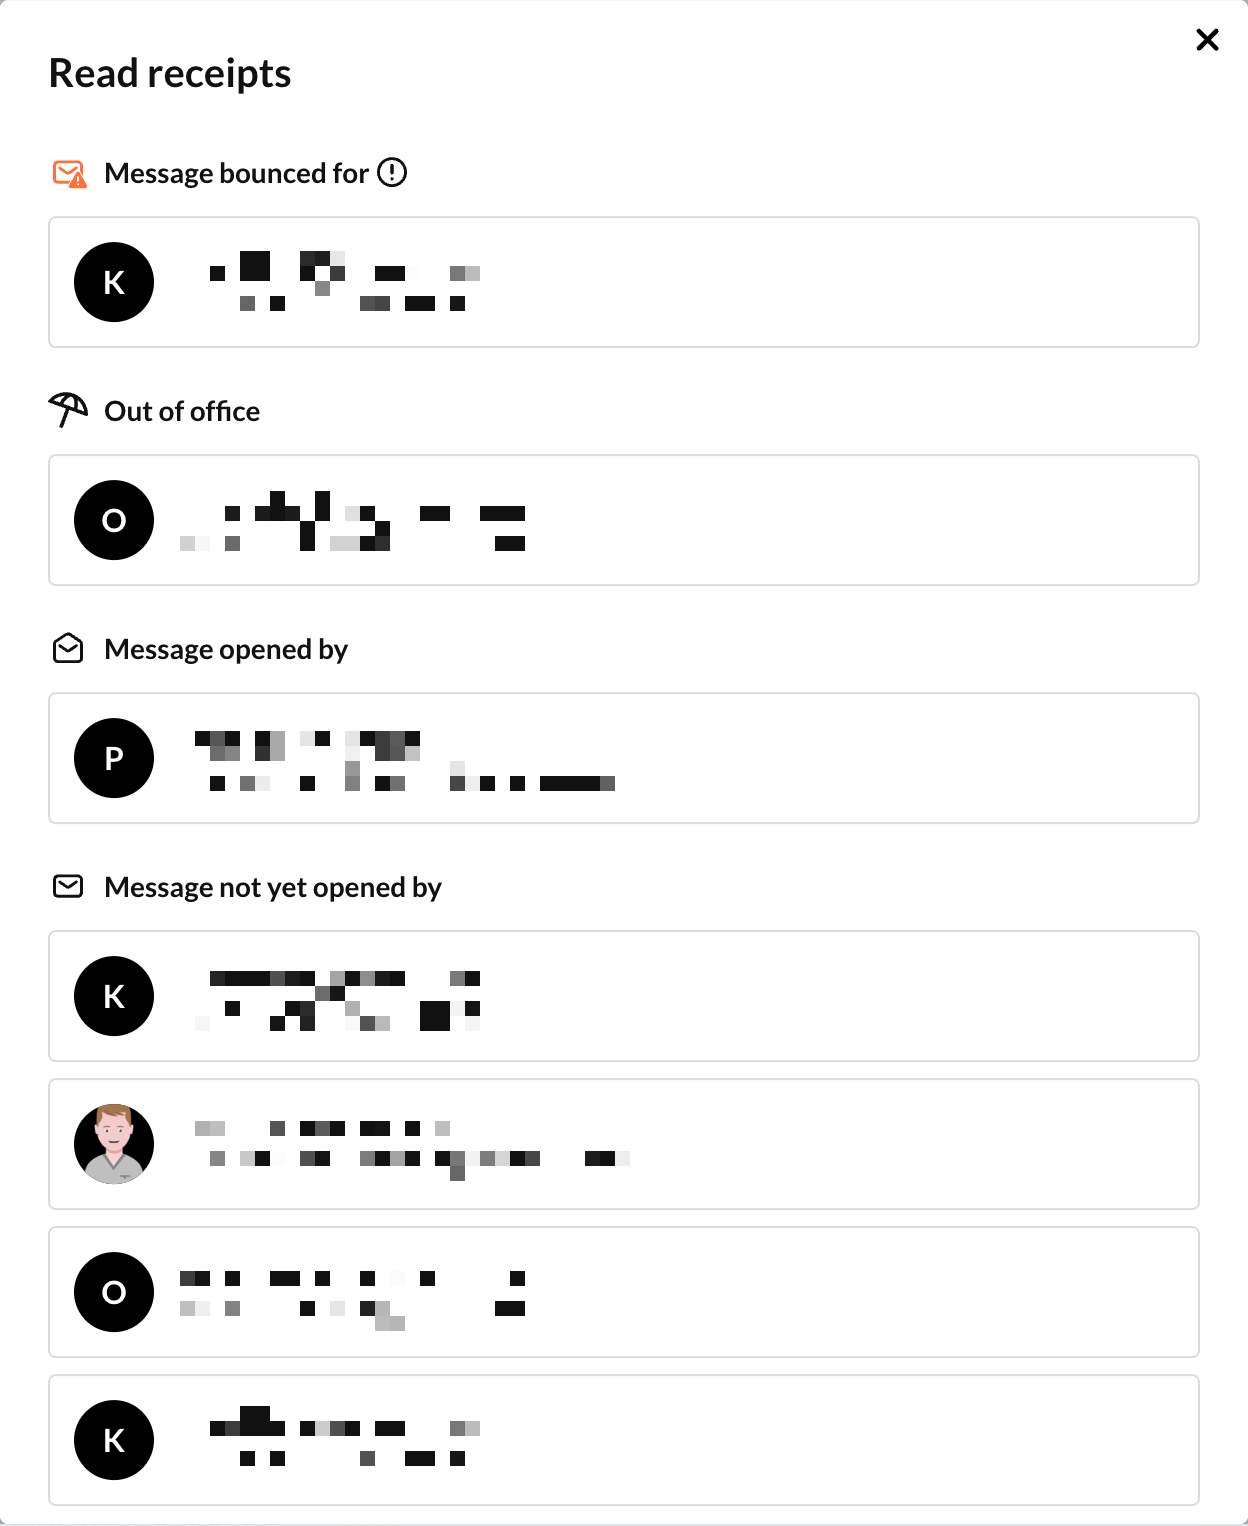
The details of the read receipt may contain the following sections:
 Message bounced for
  : This section lists the recipients for whom the message bounced. The reason for the bounce is sent to you in the email notification you receive when a message bounces. If you want to know the reason for the bounce, check your email notifications.
If this section is not present, the message was delivered to all recipients. Out of office: This section lists the recipients who have an out-of-office message set up. If you want to know the content of the out-of-office message, check your email notifications.
If this section is not present, none of the recipients have an out-of-office message set up. Message opened by: This section lists the recipients who have opened the message.
 Message not yet opened by: This section lists the recipients who have not yet opened the message.